Substance Designer Tutorial: Procedural Texture Creation
Ever felt limited by static textures? Do you dream of creating materials that are infinitely customizable, adapting to any shape or style you need? Welcome to the world of procedural textures in Substance Designer, where the only limit is your imagination.
Creating realistic and varied textures can often feel like a roadblock. Hunting for the perfect seamless image, struggling with tiling issues, or spending hours in Photoshop to create a single, unchangeable material can drain your creative energy and slow down your workflow. It can be frustrating to feel like your vision is limited by the available resources.
This tutorial aims to empower you with the knowledge and skills to generate your own unique textures using Substance Designer. We'll guide you through the fundamental concepts and techniques, allowing you to craft materials that are not only visually stunning but also completely adaptable and reusable across countless projects.
We'll embark on a journey into the world of nodes, graphs, and parameters, unlocking the secrets of procedural generation. By the end of this guide, you'll have a solid foundation in Substance Designer, ready to create everything from weathered stone walls to alien landscapes, all while saving time and boosting your creative output. Keywords we'll explore include: procedural generation, texture creation, Substance Designer, materials, nodes, graphs, parameters, and workflow.
What is Substance Designer?
Substance Designer is a powerful node-based software that allows you to create procedural textures and materials. When I first opened Substance Designer, I was completely overwhelmed by the interface. It looked like a complicated mess of interconnected boxes and wires. My initial reaction was, "How am I ever going to learn this?" I spent hours clicking through tutorials, trying to understand the basic concepts of nodes, graphs, and parameters. It felt like learning a new language. Gradually, with each tutorial I completed, things started to click. I began to understand how different nodes interacted with each other and how to manipulate parameters to achieve specific effects. The moment I created my first fully procedural brick wall texture, complete with customizable color variations, cracks, and weathering, I was hooked. The ability to create infinitely variable and seamless textures from scratch was incredibly empowering. I could finally create the exact look I wanted without being limited by pre-made assets. This experience taught me the value of perseverance and the power of procedural generation. Substance Designer is more than just software; it's a tool that allows artists to unleash their creativity and create truly unique and dynamic materials. It's a game-changer for anyone involved in 3D modeling, game development, or visual effects, offering a level of control and flexibility that is simply unmatched. This control is achieved through a non-destructive workflow, meaning you can always go back and tweak any aspect of your texture without affecting the rest. The power lies in its ability to create materials that adapt and evolve with your needs.
Why Use Procedural Textures?
Procedural textures are generated mathematically rather than being based on scanned or hand-painted images. Think of it like this: instead of painting a brick wall, you're writing a recipe for a brick wall, telling the software how to create it. This recipe is stored as a graph of interconnected nodes, each performing a specific function, like creating shapes, adding noise, or applying color gradients. This means the texture is not limited by resolution, making it incredibly scalable. You can zoom in infinitely without losing detail. Furthermore, procedural textures are easily customizable. By tweaking the parameters of the nodes, you can create countless variations of the same texture. Change the color, roughness, bumpiness, or even the entire pattern with just a few adjustments. This makes them ideal for creating large environments or generating unique assets quickly. Substance Designer takes this concept to the next level by providing a user-friendly interface and a vast library of pre-built nodes. You can combine these nodes in endless ways to create complex and realistic materials. The software also supports real-time previews, allowing you to see the results of your changes instantly. Using procedural textures can drastically improve your workflow, save valuable time, and unlock a new level of creative control over your materials. The underlying principle is the algorithm, which defines the texture's characteristics and enables its infinite scalability and adaptability.
The History and Myth of Procedural Textures
The idea of generating textures algorithmically isn't new. Its roots can be traced back to early computer graphics research. In the early days of computer graphics, memory and processing power were extremely limited. Creating detailed textures using traditional methods, like scanning or hand-painting, was simply not feasible. Researchers began exploring ways to generate textures using mathematical functions and algorithms. One of the earliest examples of procedural texturing can be found in the work of Ken Perlin, who developed the Perlin noise algorithm in the 1980s. Perlin noise is a type of random gradient noise that has become a fundamental building block in procedural generation. It's used to create a wide range of effects, from clouds and smoke to organic patterns and terrain. The algorithm proved invaluable for creating realistic-looking textures with limited computational resources. Over time, other techniques emerged, such as fractal noise, cellular automata, and reaction-diffusion systems. These techniques enabled artists and developers to create even more complex and realistic textures. The development of specialized software like Substance Designer made procedural texturing accessible to a wider audience. It provided a user-friendly interface and a vast library of pre-built nodes, allowing artists to create stunning materials without needing to write code. While the concept of procedural textures might seem technical and complex, the underlying idea is quite simple: to use mathematical functions and algorithms to create visually appealing patterns and surfaces. The myth surrounding procedural textures is that they are difficult to learn and require a deep understanding of mathematics. While a basic understanding of mathematical concepts can be helpful, it's not essential. Substance Designer provides a visual interface that makes it easy to create complex materials without needing to write code. The truth is that anyone with a creative mindset and a willingness to learn can master procedural texturing. It's a powerful tool that can unlock new levels of creativity and realism in your work. The history of procedural textures is a testament to human ingenuity and the power of algorithms to mimic and enhance the natural world.
Hidden Secrets of Procedural Texture Creation
One of the hidden secrets of procedural texture creation lies in the intelligent use of layering and masking. Often, artists new to Substance Designer will focus on creating a single, complex node graph to generate an entire texture. However, a more efficient and powerful approach involves breaking down the texture into smaller, more manageable layers, each responsible for a specific aspect of the material. For instance, when creating a brick wall texture, you might have one layer for the base brick shape, another for the mortar, a third for cracks and damage, and a fourth for surface details like dirt and grime. Each layer can be created and tweaked independently, allowing for greater control and flexibility. Masking is the key to combining these layers seamlessly. By using masks, you can selectively reveal or hide portions of each layer, creating intricate patterns and realistic variations. For example, you might use a mask to add cracks and damage only to certain bricks, or to create areas where the mortar is more worn and weathered. Substance Designer offers a wide range of masking tools, including height-based masks, curvature-based masks, and ambient occlusion masks. These tools allow you to create masks that are automatically generated based on the underlying geometry of the texture. Another hidden secret is the power of reusing and adapting existing node graphs. Substance Designer allows you to save your node graphs as custom nodes, which can then be reused in other projects. This can save you a significant amount of time and effort, as you don't have to recreate the same effects from scratch each time. You can also adapt existing node graphs to create new variations. For example, you might take a node graph that generates a wood grain texture and modify it to create a leather texture or a marble texture. The key is to understand the underlying principles of each node and how they interact with each other. By experimenting with different parameters and combinations of nodes, you can unlock a vast range of possibilities and create truly unique and original materials. The ability to layer, mask, and reuse node graphs is what separates the experienced procedural texture artist from the beginner. It's a powerful combination that allows you to create complex and realistic materials with ease.
Recommendations for Procedural Texture Creation
My top recommendation for anyone starting with procedural texture creation is to embrace experimentation. Don't be afraid to try new things, to combine different nodes in unexpected ways, and to push the boundaries of what's possible. The best way to learn Substance Designer is by doing. Start with simple projects, like creating a basic tileable pattern or a simple noise texture. As you become more comfortable with the software, gradually move on to more complex projects, like creating a realistic brick wall or a detailed metal surface. One of the most effective ways to learn is to deconstruct existing textures. Find textures that you like, whether they're from games, movies, or real-world photographs, and try to recreate them in Substance Designer. This will help you understand the techniques and workflows that are used by experienced artists. Pay attention to the way different nodes are used to create specific effects, and experiment with different parameters to see how they affect the final result. Another recommendation is to join online communities and forums dedicated to Substance Designer and procedural texture creation. These communities are a great resource for learning new techniques, getting feedback on your work, and connecting with other artists. You can ask questions, share your creations, and learn from the experiences of others. The Substance Designer community is incredibly supportive and welcoming, and there are always people willing to help you out. Furthermore, invest in quality tutorials and resources. There are many excellent online courses, books, and tutorials that can help you learn Substance Designer. Some of these resources are free, while others require a paid subscription. However, the investment is well worth it, as they can significantly accelerate your learning process. Look for tutorials that focus on specific techniques or projects, and follow along step-by-step. Finally, don't get discouraged if you don't see results immediately. Procedural texture creation can be challenging, especially at first. It takes time and practice to develop the skills and knowledge you need to create high-quality materials. Be patient with yourself, keep experimenting, and don't be afraid to make mistakes. The more you practice, the better you'll become. The journey of learning procedural texture creation is a rewarding one, filled with endless possibilities and creative opportunities.
Mastering the Node Graph
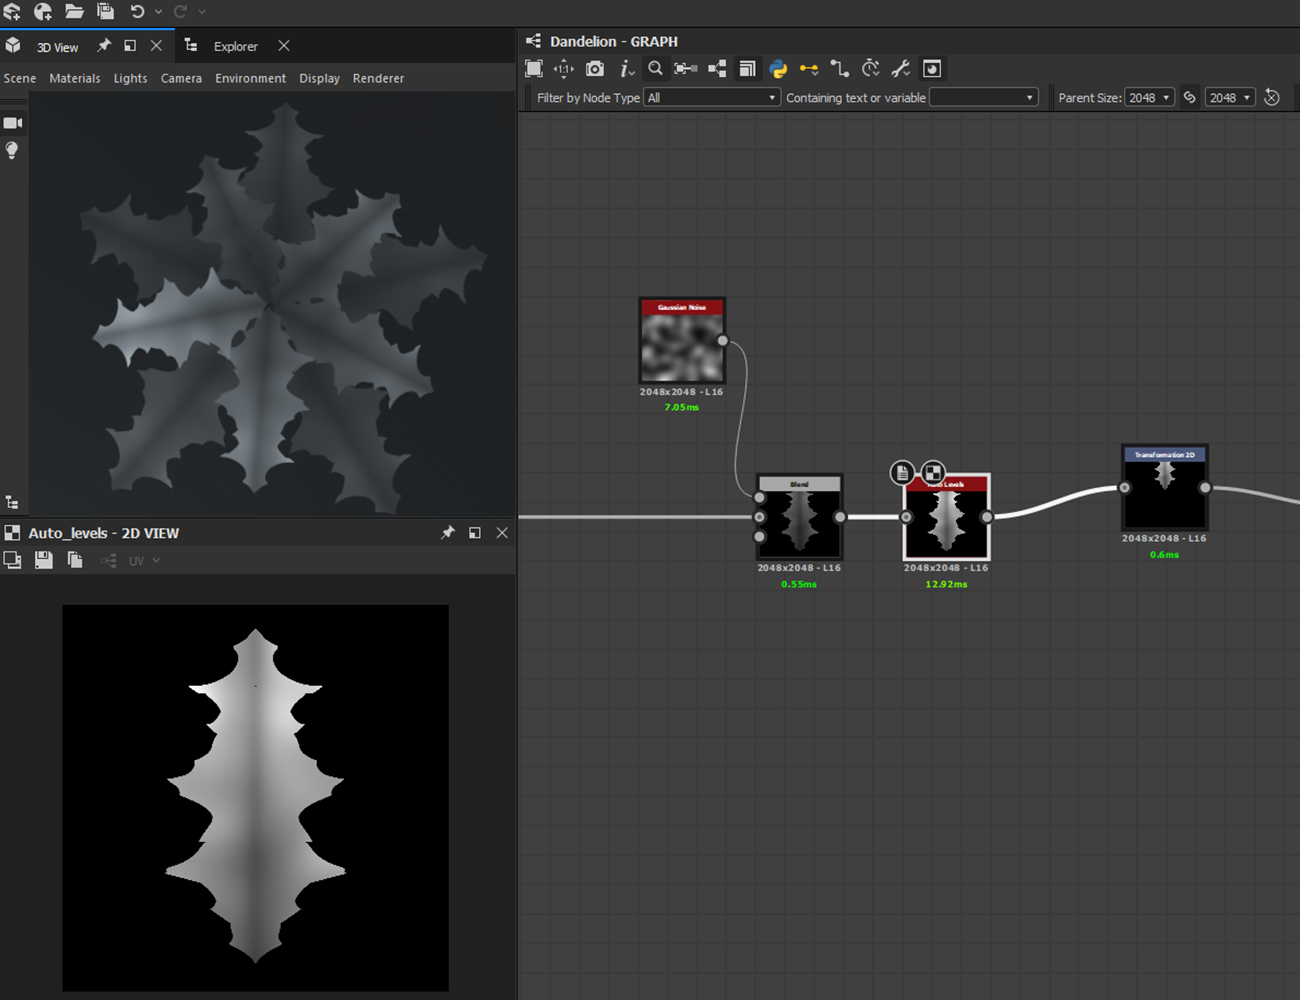
The node graph is the heart of Substance Designer. It's where you connect different nodes together to create your procedural textures. Think of it as a visual programming language for materials. Each node represents a specific function, like creating shapes, adding noise, blending layers, or applying color gradients. By connecting these nodes together in different ways, you can create a wide range of effects. Understanding the basic types of nodes is crucial for mastering the node graph. There are input nodes, which provide the starting point for your texture. These can be simple color values, grayscale images, or even complex height maps. There are processing nodes, which manipulate the input data in various ways. These include noise nodes, filter nodes, and transform nodes. And there are output nodes, which define the final properties of your material, such as its color, roughness, and height. One of the key skills in mastering the node graph is understanding how to blend different nodes together. Substance Designer offers a variety of blending modes, each of which produces a different result. You can use blending modes to combine layers, add details, or create complex patterns. Experimenting with different blending modes is a great way to discover new and unexpected effects. Another important skill is learning how to create custom functions. Substance Designer allows you to create your own nodes using the Function Graph editor. This allows you to encapsulate complex logic into a single node, which can then be reused in other projects. Creating custom functions can significantly simplify your node graphs and make them easier to manage. Finally, it's essential to keep your node graphs organized and well-structured. Use comments and frames to group related nodes together and to explain the purpose of each section of the graph. This will make it easier to understand and modify your textures later on. Mastering the node graph is a continuous process. It takes time and practice to develop the skills and knowledge you need to create complex and realistic materials. But the rewards are well worth the effort. By mastering the node graph, you'll be able to create textures that are infinitely customizable, scalable, and reusable.
Tips for Efficient Substance Designer Workflow
Efficiency is key to a smooth and productive workflow in Substance Designer. One of the most important tips is to start with a clear plan. Before you even open the software, take some time to think about the texture you want to create. Gather reference images, sketch out the basic structure, and identify the key elements you need to include. This will help you stay focused and avoid getting lost in the endless possibilities of procedural generation. Another tip is to break down complex textures into smaller, more manageable parts. Instead of trying to create everything in one giant node graph, focus on creating individual elements, like base shapes, details, and variations. Then, combine these elements using blending modes and masks to create the final texture. This approach makes it easier to control each aspect of the texture and to make changes as needed. Substance Designer offers a variety of tools to help you organize your node graphs. Use frames to group related nodes together, and use comments to explain the purpose of each section. This will make it easier to understand and modify your textures later on. You can also use the "Collapse to Graph" feature to create subgraphs, which are like mini-node graphs within your main graph. This can help you simplify complex textures and make them easier to manage. Another important tip is to use parameters effectively. Parameters allow you to control the properties of your nodes from outside the node graph. This makes it easy to create variations of your textures and to adjust them to fit different needs. Use parameters for key properties like color, roughness, and scale. Also, remember to save your work frequently and to create backups of your projects. Substance Designer can be prone to crashes, so it's important to protect your work. Save your projects in a version control system, like Git, to track changes and to revert to previous versions if needed. Finally, take advantage of the Substance Share online library. This library contains a vast collection of free and paid materials, functions, and tools that you can use in your projects. The library is a great resource for learning new techniques and for finding inspiration. Efficient workflow in Substance Designer comes down to planning, organization, and effective use of the software's tools and features. By following these tips, you can create textures more quickly and efficiently, and focus on the creative aspects of the process.
Understanding the Importance of Height Maps
Height maps are grayscale images that represent the surface elevation of a texture. In Substance Designer, height maps play a crucial role in creating realistic and detailed materials. They are used to generate various effects, such as bump mapping, normal mapping, and displacement mapping, which add depth and texture to the surface. Understanding how height maps work and how to manipulate them is essential for creating high-quality procedural textures. The grayscale values in a height map represent the height of the surface at each point. White values represent the highest points, while black values represent the lowest points. Gray values represent intermediate heights. Substance Designer offers a variety of nodes that can be used to create and manipulate height maps. Noise nodes are commonly used to generate random variations in height, while shape nodes can be used to create specific forms. Filter nodes can be used to smooth, sharpen, or blur height maps. The Height Blend node is used to combine multiple height maps together, allowing you to create complex surface details. One of the most important applications of height maps is in generating normal maps. Normal maps are used to simulate the effect of light interacting with a detailed surface, without actually increasing the polygon count of the mesh. Substance Designer can automatically generate normal maps from height maps, making it easy to add realistic surface details to your models. Height maps are also used for displacement mapping. Displacement mapping actually modifies the geometry of the mesh based on the height map, creating a truly three-dimensional surface. This technique can be used to create highly detailed surfaces, but it can also be computationally expensive. Finally, height maps are used to generate various masks, such as height-based masks, curvature-based masks, and ambient occlusion masks. These masks can be used to selectively apply effects to different parts of the texture, creating realistic variations and details. In summary, height maps are a fundamental building block in procedural texture creation. They are used to generate various effects that add depth, detail, and realism to your materials. Understanding how height maps work and how to manipulate them is essential for creating high-quality procedural textures in Substance Designer. Mastering height maps unlocks a new level of realism and control over your materials.
Fun Facts About Procedural Texture Creation
Did you know that the same procedural texture can look completely different depending on the lighting conditions and the rendering engine used? This is because procedural textures define the material's properties rather than its appearance, allowing it to adapt to different environments. It's fascinating to see how the same set of nodes can produce such varied results. Another fun fact is that many of the techniques used in procedural texture creation are inspired by natural phenomena. For example, the Perlin noise algorithm, which is widely used for creating organic textures, is based on the movement of fluids and gases. By studying nature, we can gain insights into how to create realistic and believable materials. Substance Designer is not just limited to creating realistic textures. It can also be used to create abstract and stylized materials. By experimenting with different nodes and parameters, you can create textures that are completely unique and original. This makes Substance Designer a valuable tool for artists who want to push the boundaries of creativity. Procedural textures are also incredibly efficient in terms of storage space. A single Substance Designer file, which contains all the information needed to generate a texture, can be much smaller than a traditional image-based texture. This is because procedural textures are generated on the fly, rather than being stored as static images. Procedural textures are used extensively in the game development industry. They allow developers to create high-quality materials that are both scalable and customizable. This is especially important for large open-world games, where textures need to be able to adapt to different environments and lighting conditions. Finally, procedural texture creation is a constantly evolving field. New techniques and algorithms are being developed all the time, pushing the boundaries of what's possible. This makes it an exciting and challenging field for artists who are passionate about creating realistic and detailed materials. Learning about the history and evolution of procedural textures adds another layer of appreciation for this powerful technique. It's a testament to the ingenuity of artists and developers who have pushed the boundaries of computer graphics.
How to Create a Simple Tileable Texture in Substance Designer
Creating a tileable texture in Substance Designer is a great way to get started with procedural texture creation. A tileable texture is one that can be seamlessly repeated in both the horizontal and vertical directions, creating a continuous pattern. Here's a simple step-by-step guide:
Start by creating a new Substance Designer graph. Choose the "Metallic/Roughness (Allegorithmic)" template, which is a common workflow for creating materials for games and other 3D applications. Add a "Tile Generator" node. This node will be the foundation of your tileable pattern. Adjust the parameters of the Tile Generator node to create the basic shape you want to tile. You can change the shape, size, and spacing of the tiles. Add a "Transform 2D" node after the Tile Generator node. This node will allow you to offset the tiles, which is essential for creating a seamless pattern. Set the "Offset" parameter to 0.5 in both the X and Y directions. This will shift each tile by half its width and height, creating a staggered pattern. Add a "Make It Tile" node after the Transform 2D node. This node will automatically fix any seams that may be present in the texture. Adjust the parameters of the Make It Tile node to fine-tune the tiling. Add a "Color" node to control the color of the tiles. You can set the color to any value you want. Add a "Roughness" node to control the roughness of the tiles. You can set the roughness to any value you want, from smooth to rough. Add a "Metallic" node to control the metallic properties of the tiles. You can set the metallic value to 0 for non-metallic materials and 1 for metallic materials. Connect the Color, Roughness, and Metallic nodes to the corresponding input slots of the "Material" output node. Preview the texture in the 3D view. You should see a seamless tileable pattern. Save your Substance Designer graph as a ".sbsar" file. This file can then be used in other applications, such as game engines or 3D modeling software. This is a simplified example, but it demonstrates the basic principles of creating a tileable texture in Substance Designer. By experimenting with different nodes and parameters, you can create a wide range of tileable textures, from simple patterns to complex designs. Remember to focus on creating a seamless pattern and to use parameters to control the properties of the texture.
What If You Could Only Use One Node in Substance Designer?
Imagine a scenario where you are restricted to using only one type of node in Substance Designer. What would you choose, and what kind of textures could you create? This thought experiment highlights the versatility and power of individual nodes and the underlying principles of procedural generation. If I could only choose one node, I would pick the "Perlin Noise" node. While seemingly simple, Perlin noise is the foundation for creating a vast array of textures. It generates a smooth, gradient-based noise pattern that can be used to simulate a wide range of natural phenomena, from clouds and smoke to terrain and organic textures. With just the Perlin Noise node, I could create a basic grayscale texture by simply outputting the noise directly. By adjusting the parameters of the node, such as the scale and frequency, I could create different patterns. I could also use the Perlin Noise node to generate masks for other effects. For example, I could threshold the noise to create a black-and-white mask, which could then be used to blend two different colors or textures together. I could use multiple Perlin Noise nodes at different scales and frequencies and combine them using blending modes to create more complex patterns. This would allow me to simulate things like clouds, smoke, or even wood grain. By using the Perlin Noise node to generate height maps, I could create 3D-looking textures with bump mapping or displacement mapping. This would add depth and realism to the textures. I could also use the Perlin Noise node to generate color gradients. By mapping the grayscale values of the noise to a color ramp, I could create a wide range of colorful textures. This would allow me to simulate things like gradients, fire, or even abstract patterns. While using only one node would be limiting, it would force me to think creatively and to explore the full potential of that node. It would also highlight the fundamental principles of procedural generation: the ability to create complex patterns from simple building blocks. The choice of the Perlin Noise node is based on its versatility and its ability to generate a wide range of effects. It's a testament to the power of algorithms and the ingenuity of artists who can create stunning materials with limited resources. This exercise highlights the importance of understanding the underlying principles of procedural generation and the potential of even the simplest nodes.
Listicle of Top 5 Most Useful Nodes in Substance Designer
Substance Designer boasts a vast library of nodes, each serving a unique purpose in the creation of procedural textures. However, some nodes are more versatile and frequently used than others. Here's a list of the top 5 most useful nodes in Substance Designer:
Tile Generator: This node is indispensable for creating patterns based on repeating shapes. It allows you to control the shape, size, spacing, and orientation of the tiles, making it ideal for creating brick walls, floor tiles, and other structured patterns.
Perlin Noise: As mentioned earlier, Perlin noise is a fundamental building block for creating organic textures. It generates a smooth, gradient-based noise pattern that can be used to simulate a wide range of natural phenomena.
Blur HQ: This node provides a high-quality blur effect that can be used to smooth out textures, soften edges, or create a sense of depth. It's a versatile tool that can be used in a variety of ways.
Height Blend: This node allows you to combine multiple height maps together, creating complex surface details. It's essential for creating realistic terrain, rock formations, and other 3D-looking textures.
Gradient Editor: This node allows you to create and edit color gradients. It's a powerful tool for creating colorful textures and for mapping grayscale values to different colors.
These five nodes represent a core set of tools that are essential for creating a wide range of procedural textures in Substance Designer. By mastering these nodes, you'll be well on your way to creating stunning and realistic materials. The versatility of these nodes lies in their ability to be combined and manipulated in endless ways. For example, you can use the Tile Generator to create a basic shape, then apply Perlin noise to add organic variations, and finally use the Blur HQ to smooth out the edges. By understanding the strengths and weaknesses of each node, you can create a workflow that is both efficient and effective. This list is not exhaustive, and there are many other useful nodes in Substance Designer. However, these five nodes represent a solid foundation for learning and mastering the software. As you become more experienced, you'll discover other nodes that fit your specific needs and workflow. The key is to experiment and to find the tools that work best for you.
Question and Answer About Substance Designer Tutorial
Here's a question and answer section about Substance Designer Tutorial:
Question 1: Is Substance Designer difficult to learn?
Answer: Substance Designer has a learning curve, especially if you're new to node-based workflows. However, with patience and practice, anyone can learn to create amazing textures. Start with the basics and gradually work your way up to more complex techniques.
Question 2: What are the system requirements for running Substance Designer?
Answer: Substance Designer requires a decent computer with a dedicated graphics card. Check the official Adobe Substance 3D website for the latest system requirements.
Question 3: Can I use textures created in Substance Designer in any game engine?
Answer: Yes, textures created in Substance Designer can be exported in various formats compatible with most game engines, such as Unreal Engine and Unity.
Question 4: Where can I find resources and tutorials for Substance Designer?
Answer: Adobe Substance 3D website, You Tube, and various online learning platforms offer a wealth of tutorials and resources for Substance Designer.
Conclusion of Substance Designer Tutorial
In conclusion, mastering Substance Designer empowers you to create a world of infinitely customizable textures. From understanding the power of nodes and graphs to exploring the potential of procedural generation, this tutorial has provided a foundation for your journey. Embrace experimentation, learn from the community, and never stop exploring the boundless possibilities of Substance Designer. With dedication and practice, you can unlock your creative vision and craft stunning materials that bring your projects to life.
Post a Comment